Pre-Supported vs. Unsupported STL Miniatures: What the Difference Actually Means for Beginners
Pre-supported STL files save time but limit control. Unsupported files give you flexibility but require skill. Here's how to decide which to download, and when each option makes sense.
This guide contains affiliate links. We may earn a small commission at no extra cost to you.
When you start browsing STL marketplaces for miniatures, you’ll run into the same choice on almost every listing: pre-supported or unsupported. Sometimes it’s two separate downloads. Sometimes the creator only offers one. And if you’re new, the distinction isn’t obvious. Both options look identical in the thumbnail.
The difference matters more than the thumbnail suggests. Choosing wrong won’t break your printer, but it will cost you time and failed prints. Here’s what each option actually means and how to pick the right one for where you are in the hobby.
If you’re still deciding where to find STL files in the first place, the best STL sites for miniatures guide covers all the major marketplaces and subscription services.
What Supports Are and Why They Exist
Resin printing works by curing liquid resin one layer at a time, upside down, pulled off the bottom of a vat. Every layer needs to be attached to something: either the build plate or the layer before it.
The problem: miniatures aren’t solid columns. They have arms reaching out, capes flowing, swords angled away from the body. When the printer reaches one of those overhanging features, the new layer has nothing underneath to attach to. It cures in the resin, sticks to the FEP, and gets ripped away from the print. That’s a failed layer, and it cascades into a failed print.
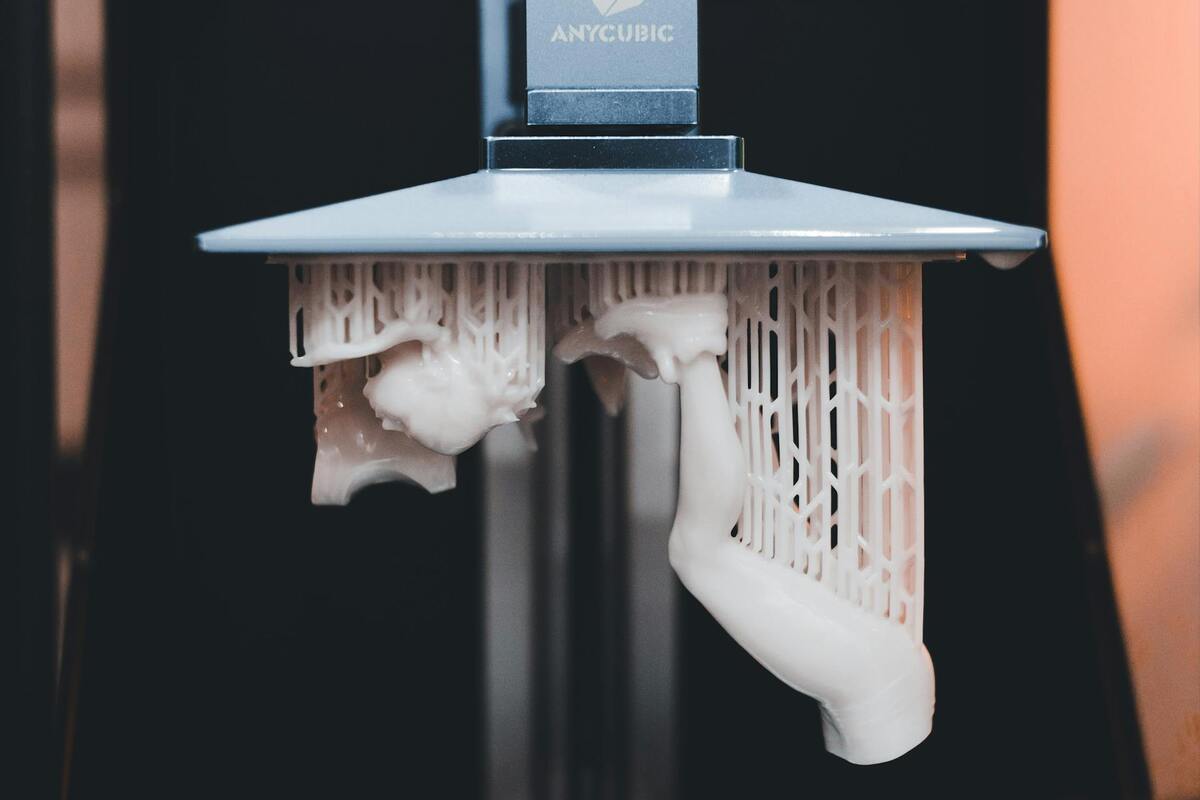
Supports are thin scaffolding structures (narrow pillars with small contact points) that hold those overhangs in place during printing. After the print finishes, you clip them off with flush cutters.
Every resin miniature needs supports unless you’re printing something geometrically simple (a cube, a cylinder, a flat base). For anything with detail, supports are not optional.
If you want the full walkthrough on placing supports yourself, the supports guide covers placement strategy, tip sizes, and density settings.
Pre-Supported Files: What You Get
A pre-supported STL file comes with supports already placed by the model’s creator. When you open the file in your slicer, the model appears fully supported and oriented, ready to slice and print without adding anything.
The appeal is obvious: skip the hardest part of the workflow. Support placement is the single most common failure point for beginners. Getting it wrong means failed prints, wasted resin, and time spent troubleshooting when the real problem was support placement from the start.
Pre-supported files from experienced creators are generally placed well. Creators like Artisan Guild, Loot Studios, and Titan Forge test their pre-supports on specific printers and publish the settings they tested with. When those pre-supports work, they work very well.
Where pre-supported files shine
-
You’re new to resin printing. Removing the support placement step lets you focus on learning everything else: slicer settings, exposure calibration, wash and cure workflow. One fewer variable to troubleshoot when something goes wrong.
-
You’re batch printing. Loading a build plate with six pre-supported minis and hitting print is genuinely faster than manually supporting each one. For painting sessions where you need a party of characters by Saturday, pre-supported files save real time.
-
The creator tests their supports. The best STL creators print their own files and iterate on support placement before publishing. Those supports are better than what most beginners would place themselves.
Where pre-supported files cause problems
-
Different printer, different results. Pre-supports are tested on a specific printer with specific settings. If you’re running a different machine (different build plate size, different LCD resolution, different firmware) the pre-supports may not be optimized for your setup. An Elegoo Saturn and an Anycubic Photon Mono have different characteristics, and supports that work perfectly on one may produce minor artifacts on the other.
-
Fixed orientation. The creator picked the print orientation when they placed supports. You can’t rotate the model without invalidating all the support placement. If the chosen orientation doesn’t fit your build plate arrangement or produces layer lines where you don’t want them, you’re stuck with it.
-
Contact points leave marks. Support tips leave small nubs on the model surface where they connect. Good pre-supports use small tip sizes (0.2–0.3mm) on visible surfaces and larger tips (0.4–0.6mm) on hidden areas like the underside of bases. But you can’t adjust these. If the creator used heavy supports on a face or chest detail, you’ll be sanding those marks off.
-
File size. Pre-supported files are significantly larger than unsupported versions because they contain all that extra geometry. This matters less for storage, but it means longer slicing times and heavier files to manage in your library.
Unsupported Files: What You Get
An unsupported STL file is the raw model with no supports and no orientation. You open it in your slicer, orient it on the build plate yourself, and add supports manually using your slicer’s support tools.
This requires skill. You need to understand which surfaces need support, how dense to make the support field, what tip sizes to use for different areas, and how to orient the model to minimize both support count and visible contact marks.
Where unsupported files shine
-
Full control. You choose the orientation. You choose the tip sizes. You choose where supports contact the model and where they don’t. For miniatures with detailed front faces, you can orient the model so supports only touch the back. That’s something you can’t do with a pre-supported file that was oriented differently.
-
Optimized for your printer. You learn what your specific printer handles well and place supports accordingly. Over time, you develop a sense for what your machine needs. Maybe your Elegoo Saturn handles 45-degree overhangs without support but your friend’s Anycubic needs support at 40 degrees.
-
Smaller files. Easier to manage, faster to slice.
-
Learning investment pays off. Once you’re comfortable placing supports, you can print anything from any source, including free models from Thingiverse and Printables that almost never come pre-supported.
Where unsupported files cause problems
-
Steep learning curve. Support placement is genuinely the hardest skill in resin printing. Beginners will fail prints. That’s not a character flaw, it’s the normal learning process. But it costs resin and time.
-
Time per model. Supporting a complex miniature takes 10–30 minutes depending on the model and how careful you want to be. For a full warband of eight models, that’s potentially hours of prep before you print anything.
The Decision Framework
This isn’t ideology. It’s a practical decision based on where you are and what you’re printing.
| Situation | Use Pre-Supported | Use Unsupported |
|---|---|---|
| First 10 prints | Yes | No |
| Batch printing game night minis | Yes | Only if you’re fast at supports |
| Display piece you want perfect | No | Yes |
| Free STL from Thingiverse | N/A (rarely available) | Only option |
| Subscription service (Tribes, Patreon) | Usually included | Available as alternate download |
| Learning the hobby long-term | Start here | Graduate to here |
The honest recommendation: start with pre-supported files and transition to unsupported as you gain confidence. Most subscription services on MyMiniFactory Tribes and Patreon include both versions in every release specifically because their audience spans beginners through experts.
A Practical Transition Path
Here’s how I’d approach it if I were starting over:
Months 1–2: Print pre-supported files exclusively. Focus on learning your slicer settings, exposure calibration, and post-processing workflow. The beginner’s guide covers the full workflow if you haven’t printed your first miniature yet.
Month 3: Start downloading both versions. Open the pre-supported file in Lychee and study where the creator placed supports: what angle triggers a support, where the heavy vs. light supports go, how the orientation was chosen. Then open the unsupported file and try placing supports yourself, comparing your placement to the creator’s.
Month 4 onward: Support your own files for models where orientation matters to you. Keep using pre-supported files for batch jobs and game night deadlines where speed matters more than control.
This isn’t a hard timeline. Some people get comfortable with manual supports in two weeks. Others stay on pre-supported files for six months and produce great prints the entire time. Neither approach is wrong. The goal is printing miniatures you’re happy with, not performing some abstract skill for its own sake.
What to Look for in Good Pre-Supports
Not all pre-supported files are created equal. When evaluating a creator’s pre-supports:
- Tip size on visible surfaces should be 0.3mm or smaller. Larger tips leave bigger marks that are harder to clean up before painting.
- Support density should be reasonable. Over-supported models waste resin and create more cleanup. Under-supported models fail. Good creators find the balance.
- The model should be oriented to minimize supports on the face and front torso. These are the areas you’ll paint with the most detail. They should have the fewest contact marks.
- The creator should publish their test settings. Printer model, layer height, exposure time. If they don’t tell you what they tested on, you’re guessing whether their supports will work on your machine.
Pre-support availability also varies by platform, not just by creator. Curated miniature marketplaces tend to carry pre-supported versions as the norm; broader general-purpose marketplaces are more hit-and-miss. The Cults3D review covers exactly where that platform lands on pre-supported coverage compared to MyMiniFactory, which is worth knowing before you buy a file expecting supports that aren’t there.
The Bottom Line
Pre-supported files are a genuine convenience, not a crutch. Unsupported files are a genuine skill investment, not unnecessary difficulty. Both have a place in your workflow at different stages and for different projects.
Start where the friction is lowest (pre-supported files from quality creators) and build toward manual support placement as your confidence grows. The prints don’t care how the supports got there. They care that the supports were in the right place.
Once you’re loading pre-supported files into a slicer, the next question is usually which slicer to use and how to configure it without accidentally adding supports on top of the creator’s work. The ChituBox vs. Lychee guide for pre-supported files covers exactly that.