How to Add Supports for Resin Miniature Printing
Manual vs auto-supports in ChituBox and Lychee Slicer, with practical placement tips for miniatures. Stop failing prints before they start.
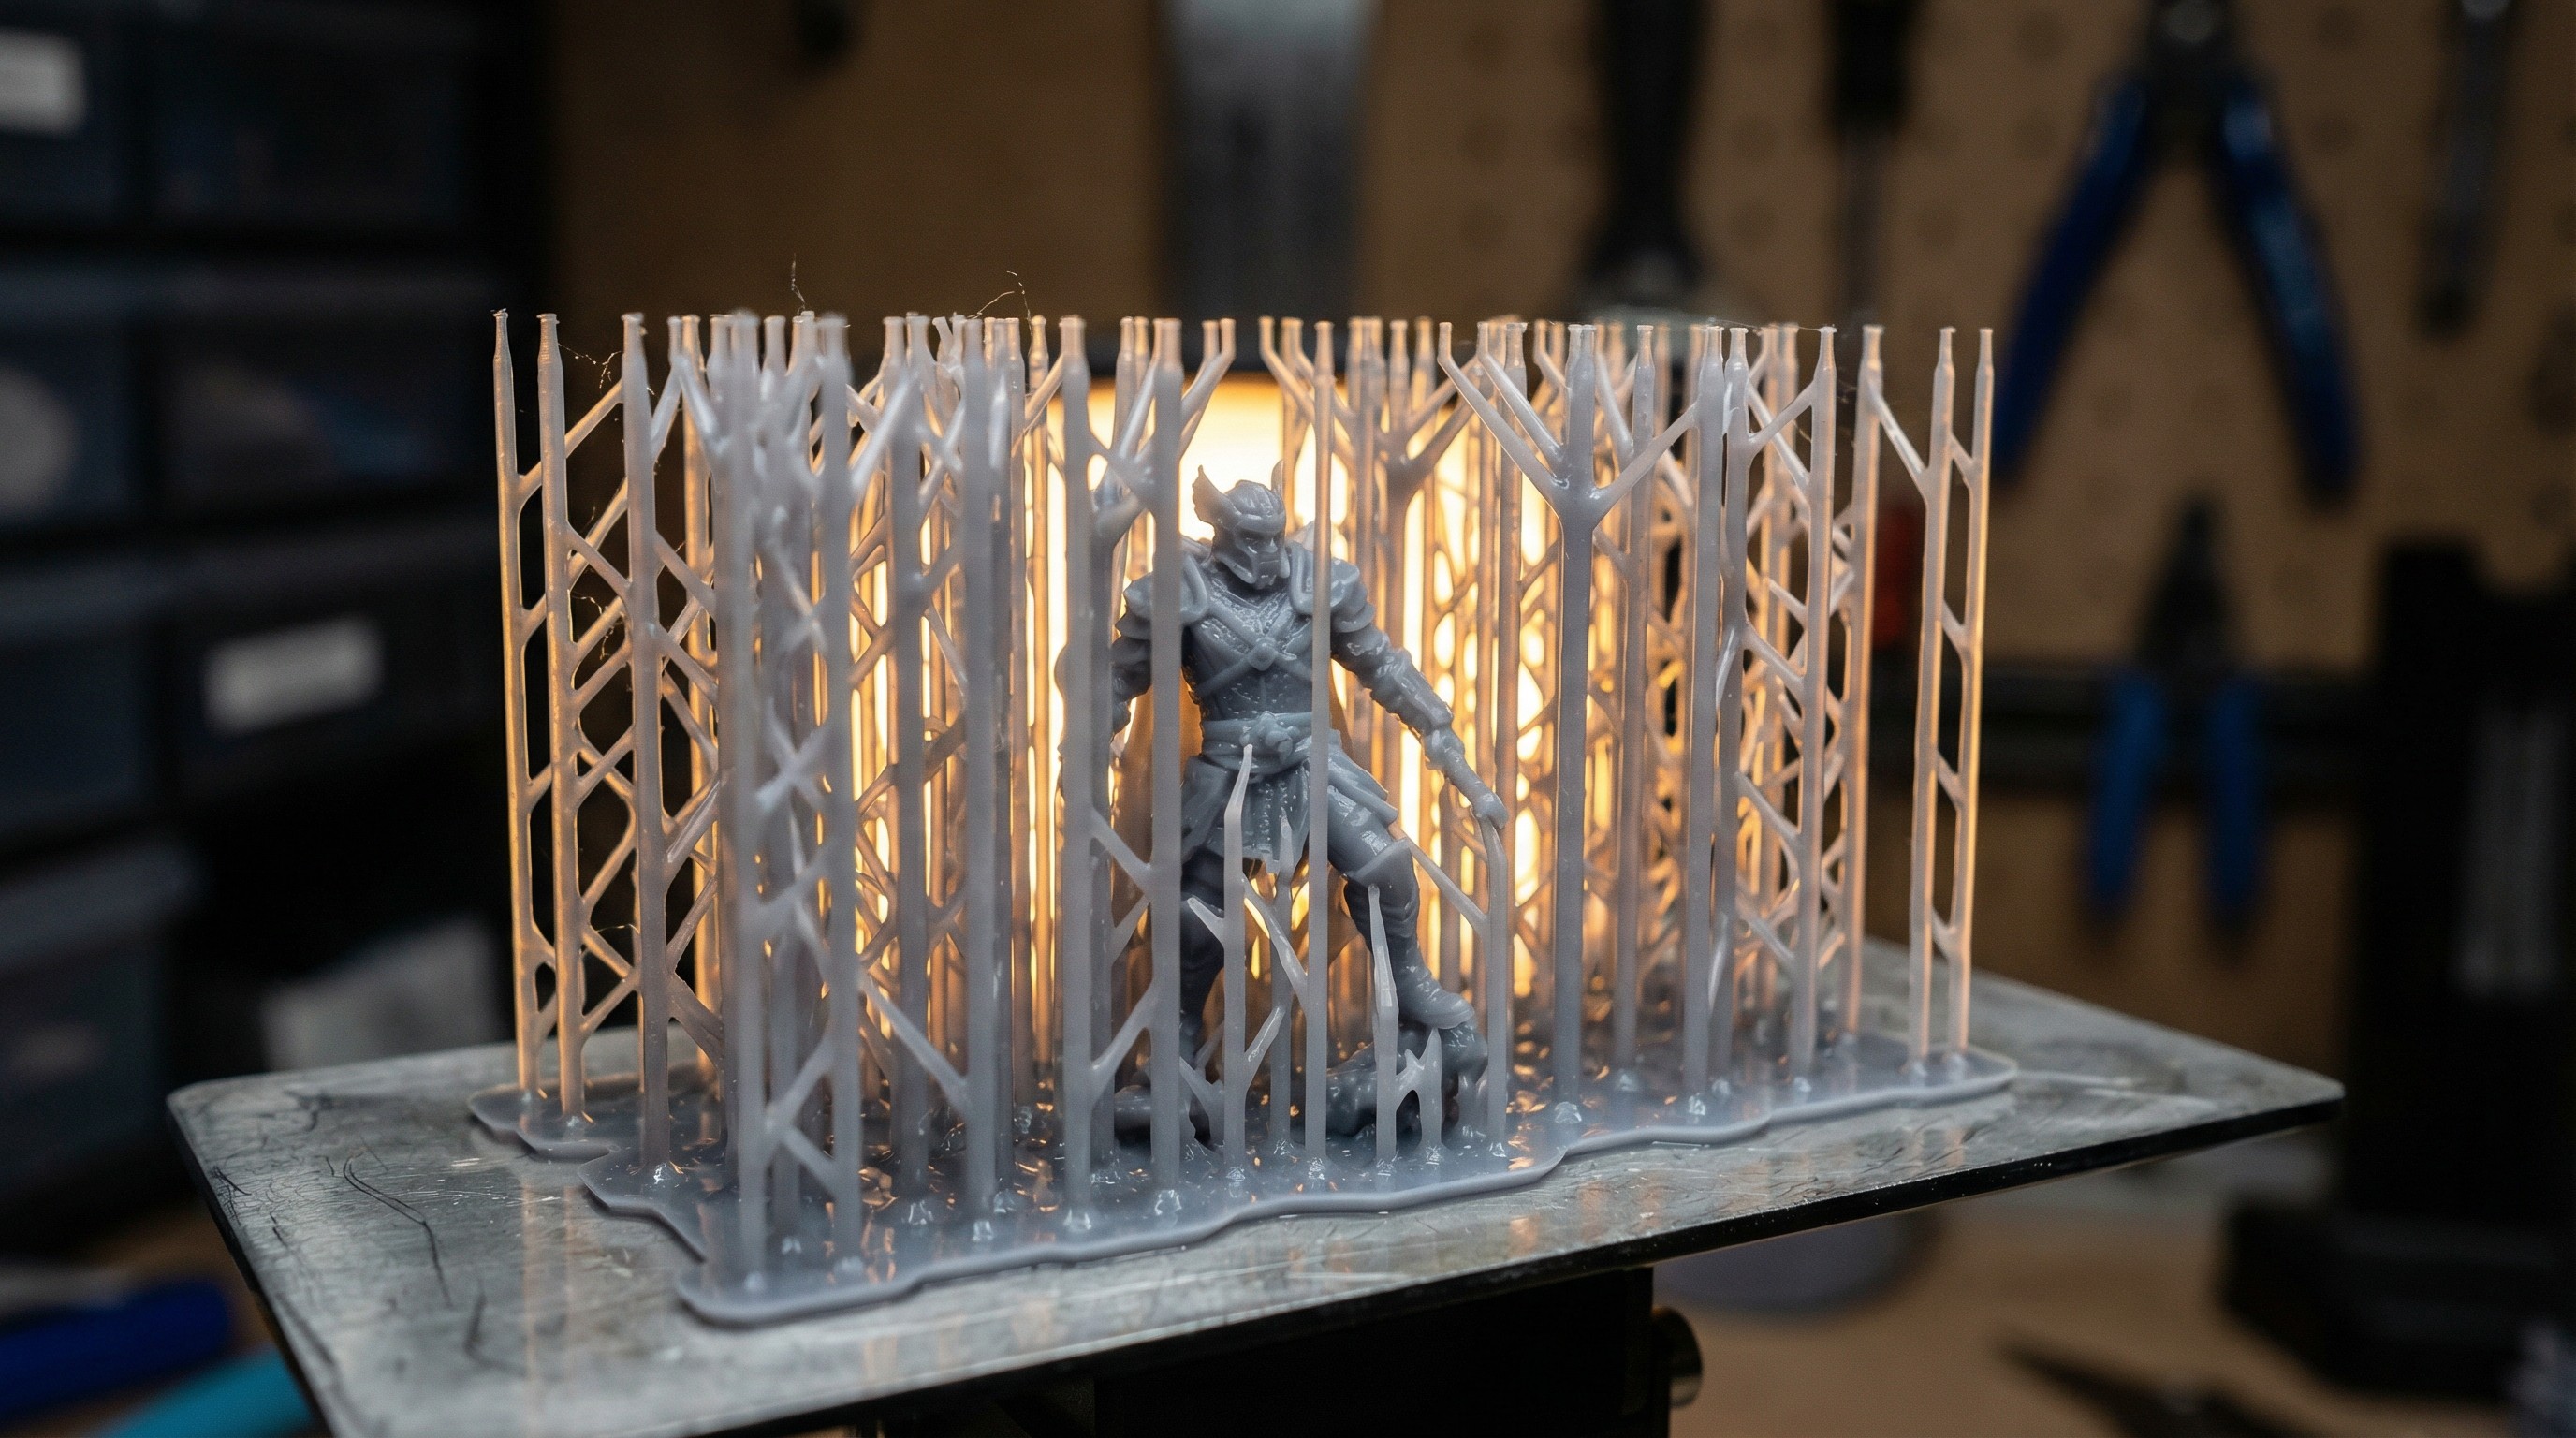
Supports are the number one reason resin miniature prints fail. Not exposure settings. Not resin quality. Not the printer. Supports.
Specifically: too few of them, placed wrong. The print starts well and then somewhere around the outstretched arm or cloak hem, a layer peels loose, gets dragged back into the FEP, and your build plate finishes pulling air for the next three hours. You find out when you come back to a clean plate and a cloudy resin vat.
This guide is about not doing that. I’ll cover how supports work, when auto-supports are good enough, when they aren’t, and how to place them manually in both ChituBox and Lychee Slicer for actual miniatures — not generic objects.
Why Miniatures Need Specific Support Thinking
Generic 3D printing support advice talks about overhangs over 45 degrees. That’s fine for functional parts. For miniatures, the relevant features are different:
- Thin extended parts — sword tips, staff tops, outstretched weapon arms, and antennae that extend away from the body and have almost nothing to connect them at the tip
- Horizontal masses — cloaks, wide hat brims, shield faces, horizontal spell effects
- Bottom islands — any surface that doesn’t connect to the rest of the model below a certain height: the underside of a cloak, the bottom of a bent knee, hanging pouches
- Suction surfaces — large flat areas facing down that create suction against the FEP on each peel
These all fail for different reasons. Thin extended parts vibrate and deflect. Horizontal masses peel. Bottom islands have no attachment point and separate. Suction surfaces pull free on the first strong peel force.
Understanding which problem you’re solving changes where you put supports.
Orientation First, Supports Second
Support placement starts before you open the support tool. Orientation is half the battle.
For most humanoid miniatures, a 40–50 degree tilt is the standard starting point. This does two things:
- Reduces the cross-sectional area of each layer, which reduces peel forces throughout the print
- Puts most of the overhangs at angles that auto-supports handle reliably
Completely upright prints have large flat horizontal layers that require heavy support, and the base section builds up slowly in the early layers where failures are most common. Completely flat orientation (laying the miniature on its back) creates long, low-angle overhangs across the whole body and generates enormous suction on every layer.
Tilted at 40–50 degrees, with the feet pointing toward the build plate and the model angled away from you, most miniatures print with manageable support requirements.
Rotate the model to get the most supported section at the bottom. For a standing warrior: feet down, body angled back. For a flying model: orient so the main body mass has the most direct connection to the raft, with wings offset.
Once orientation is dialed in, run auto-supports and see what’s missing.
Auto-Supports: What They’re Good At and Where They Miss
Both ChituBox and Lychee have auto-support generators that work reasonably well for supported sections of the model — the main body, clothing folds, large surfaces. Run them. They catch the obvious stuff.
Where they reliably miss:
- Weapon tips and thin ends — The auto-detector often misses the very tip of a sword, staff, or wand because the geometry tapers to a point. That tip will vibrate and eventually detach or warp.
- Undersides of bent features — The inside of a bent elbow, the underside of a raised knee. Auto-supports look for extreme overhangs; these gentle curves pass under the threshold.
- Cloak and fabric edges — The outer edge of a flowing cloak may be flagged or may not. Even when flagged, auto placement sometimes puts the support in the wrong spot relative to the model’s grain.
- Fingertips and individual fingers — On detailed hand sculpts, individual fingers extending outward frequently get missed.
After auto-support, zoom in on every extremity and manually check these areas. If the tip of something extends into open air with nothing supporting it, add a manual support.
ChituBox: Manual Support Placement
ChituBox uses a dedicated support tab on the left panel. After running auto-supports, switch to manual mode to add and edit.
Adding a support:
- Click the support icon (tree icon) in the left panel
- Select “Manual” at the top of the support settings
- Click directly on the model surface where you want a support tip placed
The support will generate from your click point down to the raft. ChituBox calculates the angle and generates a support tree.
Support settings for miniatures:
- Top diameter: 0.3–0.4mm for fine features (fingers, weapon tips); 0.5–0.6mm for larger surfaces
- Bottom diameter: 0.8–1.0mm
- Contact depth: 0.1–0.2mm — deeper creates a stronger connection but leaves a more visible mark
- Angle: 45–60 degrees works for most cases
Editing existing supports: Right-click a support to delete it. Left-click drag to move the contact point. For areas where auto-placement put supports in poor positions (inside a detail groove, on top of a face feature), delete and manually replace.
ChituBox auto-support settings worth changing: The default auto-support settings are tuned for generic objects. For miniatures:
- Reduce support density to medium — heavy density creates so many contact points that cleanup becomes a problem
- Enable “Small Area” detection — this catches the thin features auto-support misses
- Check “Internal” supports if your miniature has enclosed spaces (like a cloak wrapping around a body)
Lychee Slicer: Manual Support Placement
Lychee has a more visual support workflow that most miniature printers prefer. The support mode is accessed from the left toolbar.
Adding a manual support in Lychee:
- Enter Support mode from the left panel
- Select “Manual” from the support type dropdown
- Click on the model surface — Lychee shows a preview before placing
Lychee’s support preview is more useful than ChituBox’s for miniatures because it shows the contact point marker on the model surface before you commit. You can see exactly where the tip will touch.
Support presets: Lychee includes mini-specific presets. “Miniature Light” and “Miniature Medium” are good starting points. Light works for fine features and areas you want minimal scarring. Medium for structural supports on heavy overhangs.
The “Analyze” feature: Lychee’s analyze tool (the magnifying glass icon in support mode) runs an overhang detection and highlights problem areas in red. Run this after auto-support placement. Red areas that still have no support after auto-generation are where you add manual supports next.
Island detection: Lychee explicitly calls out “islands” — model sections that don’t connect to anything below them. The island count appears at the top of the support view. Your goal before slicing is zero islands. If you have islands remaining after auto-support, find them in the list and manually support each one.
Practical Miniature Scenarios
Humanoid warrior with sword raised
This is the most common miniature type and the most predictable support problem.
After tilting 45 degrees and running auto-supports: check the sword tip, the raising arm’s elbow underside, any fingers wrapped around the hilt, and the cloak or cape edge if present.
The sword tip almost always needs a manual support. Add one at the very point, contact depth 0.1mm. The tip may still warp slightly if it’s extremely thin — this is a model design limitation, not a support failure.
Flying or mounted miniature
Flying models present the hardest support challenge because nothing naturally connects to the build plate. The model’s weight transfers through whatever attachment point you choose.
Options:
- Use the flight stand peg as the main attachment point — orient so the peg points toward the build plate, and add heavy supports to the peg itself
- Print the model lying sideways — requires more supports across the body but distributes load more evenly
- Print in pieces if the slicer supports it — body and wings separately, glue post-print
For mounted miniatures (rider on horse), print separately and assemble afterward. The rider-plus-horse print requires complex support geometry and the contact points between rider and mount almost always fail.
Spellcaster with horizontal arm
An outstretched horizontal arm pointing toward the camera is the classic failure mode for spellcaster sculpts.
The arm needs supports underneath it at regular intervals — not just at the tip. Think of it like a bridge: the tip needs one support, but the span needs several more to prevent sagging between them.
For an outstretched arm 15mm long, add supports at 5mm intervals underneath. Use light supports (0.3mm contact) to minimize scarring on the arm surface.
Raft Settings That Affect Support Adhesion
The raft is the foundation everything else builds on. Settings that affect it:
Bottom exposure layers: 8–12 layers of extended exposure creates a solid raft that sticks hard to the build plate. Too few layers and the raft peels; too many creates a raft so welded to the plate that you bend it getting it off.
Raft thickness: 1.5–2mm is standard. Thinner rafts are easier to remove but flex more during printing. For heavy models or multiple miniatures on one plate, 2mm.
Anti-suction structures: Lychee includes an anti-suction feature (sometimes called “perforated raft” or “relief holes”) that cuts small holes in the raft surface. This reduces the vacuum effect on large flat raft areas. Worth enabling, especially for bigger prints.
Removing Supports Without Destroying the Miniature
Support removal is where a lot of otherwise good prints get damaged. The approach matters.
Remove supports after washing, before final cure. The IPA wash leaves the resin in a slightly flexible green state. In this state, supports bend and snap at the contact point cleanly. If you cure first and then try to remove supports, the resin is hard and brittle — supports snap at the contact point but also sometimes take a chunk of model with them.
Tools:
- Fine flush-cutters (not standard flush-cutters — the fine type have a thinner blade that gets into tight spots; Xuron and Tamiya are the go-to brands)
- Dental picks for breaking contact points on hard-to-reach areas
- Sprue cutters for thicker support bases
Technique: Cut support columns from the base up, not from the contact point down. If you grab the support column and bend it toward the model, you’ll lever the contact point and potentially crack the model surface. Cut at the lower column first, then remove the stub from the contact point with a pick.
For faces, trim contact points with a sharp hobby knife after the final cure. The slight nub left by support removal on a face is better removed with a blade than with cutters, which can crush the feature.
What Good Support Placement Looks Like
When you’ve done it right:
- Zero islands in the slicer preview
- No large unsupported overhangs (check especially: weapon tips, cloak edges, horizontal arms)
- Supports making contact with surfaces, not air
- Support density high enough to hold geometry but not so dense that removal takes longer than painting
Run a test print of a problem miniature type before you commit to a full plate. Print one soldier with a raised sword, verify the sword tip, adjust the support placement, then duplicate to fill the plate.
The first time you add supports carefully and watch a complex miniature come off the plate in one piece is a good moment. Supports are annoying. They also make the difference between a print that works and one that doesn’t.
For more on the full print workflow from start to finish, see the beginner’s guide to resin printing miniatures. If you want the slicer-level detail on support configuration, the Lychee slicer settings guide includes a dedicated support section; the Chitubox settings guide for miniatures covers the same ground for Chitubox users. Once you’ve got clean prints off the plate, the support mark removal guide covers cleanup before priming, and the painting guide picks up from there. For the tools that make support work cleaner (fine flush-cutters, IPA, filter funnels, and everything else you need stocked), the resin printer accessories guide has the full list. If you’re looking for low-risk files to practice support placement on before committing to a paid sculpt, the free DnD STL miniatures roundup covers the best free characters, monsters, and terrain available.
Before any print session, make sure gloves are on, ventilation is running, and IPA or wash solution is within reach. Full PPE and ventilation setup is in the resin printing safety guide.